


How to Improve Workout Performance: Expert Tips for Lifters
Every dedicated lifter knows the sting of a stalled bench press or a nagging fatigue that makes heavy sets feel heavier than they should. Research indicates that as many as 70% of strength athletes encounter a performance plateau within just three months of consistent training—and breaking through isn’t about sheer willpower alone. It takes a thoughtful, full-spectrum strategy that addresses everything from dynamic warm-ups and flawless technique to targeted nutrition, smart supplementation, proper hydration, recovery tactics, and the right equipment.
This guide distills years of sports-science insights and hands-on experience into ten clear, evidence-backed steps. You’ll learn how to set precise goals, fine-tune your warm-up and lifting form, leverage compound movements, apply progressive overload, fuel your body for peak output, and invest in gear that supports every rep. Ready to transform frustration into progress? Let’s start with Step 1: Define Your Performance Goals and Assess Your Baseline.
Step 1: Define Your Performance Goals and Assess Your Baseline
Before you load the bar or chalk up your hands, it’s crucial to know exactly what you’re aiming for—and where you stand right now. Laying out clear, measurable targets not only sharpens your focus, it keeps you honest on days when motivation dips. Equally important is a reliable baseline assessment: without knowing your starting point, you won’t be able to quantify progress or pinpoint weak links in your training.
Set SMART Goals for Strength and Endurance
SMART goals turn vague wishes into concrete plans. Here’s how to apply each criterion:
- Specific: “Increase bench press” becomes “Add 20 pounds to bench press 1RM.”
- Measurable: Define exactly what you’ll measure—weight, reps, distance, time.
- Achievable: Factor in your training history and recovery capacity.
- Relevant: Match your goals to the lifts or events you care about—say, a heavier squat or faster 5K time.
- Time-bound: Give yourself a deadline, like “in 12 weeks” or “by the end of the quarter.”
Example:
“I will boost my 1RM bench press from 200 to 220 pounds in 12 weeks, tracking progress every fortnight.”
Write your goals in a training log or a note-taking app, then review them each week to stay on course.
Measure Your Current Strength and Endurance Levels
Gathering baseline data is easier than you might think—and doing it safely matters just as much as doing it accurately. These simple protocols will help you zero in on your strengths and identify areas to prioritize:
-
1RM Estimation (Strength)
• Warm up with submaximal sets (e.g., 5 reps at 50%, 3 reps at 70%), then perform your heaviest set for 3–5 reps.
• Use the Epley formula to estimate 1RM:1RM = weight × (1 + reps ÷ 30)• Note any aches or form breakdowns.
-
AMRAP Set (Muscular Endurance)
• Choose a submaximal weight—roughly 60% of your estimated 1RM.
• Perform as many reps as possible (AMRAP) with perfect form.
• Record the rep count and rate of perceived exertion (RPE). -
Timed Circuit (Cardio Endurance)
• Select 4–5 movements (e.g., air squats, push-ups, kettlebell swings, rowing).
• Set a 10-minute clock; cycle through each exercise for 45 seconds of work, 15 seconds rest.
• Track total rounds completed and average heart-rate zone.
Always warm up thoroughly, have a spotter when necessary, and scale loads conservatively. This baseline snapshot will guide your next steps.
Choose Tracking Tools and Metrics
Armed with goals and baseline numbers, pick tools that fit your style—whether you prefer pen and paper or high-tech gadgets.
- Spreadsheets: Customizable columns let you chart lifts, rep schemes, RPE and notes.
- Fitness Apps: Many apps sync with wearables to log heart rate, velocity, and even bar-path data.
- Wearable Trackers: Devices that monitor sleep, recovery scores, and training load can reveal hidden fatigue.
Key metrics to track:
- Lift velocity (m/s or qualitative fast/slow)
- Heart-rate zones (e.g., Zone 2 for aerobic base, Zone 5 for max effort)
- RPE (scale of 1–10)
- Volume load (
weight × reps × sets)
Sample log entry:
| Date | Exercise | Sets × Reps | Weight (lbs) | RPE | Notes |
|---|---|---|---|---|---|
| 2025-06-01 | Bench Press | 3 × 5 | 200 | 8 | Bar path slightly off |
| 2025-06-01 | Back Squat | 3 × 8 | 185 | 7 | Felt strong, depth good |
| 2025-06-01 | AMRAP Push-Up | 1 × 20 | Bodyweight | 9 | Form faltered at rep 15 |
Think of your log as a training compass—review it weekly to make informed tweaks, celebrate small wins, and stay accountable to your big-picture goals.
Step 2: Implement an Evidence-Based Dynamic Warm-Up
A solid dynamic warm-up primes your nervous system and muscles to perform optimally. Unlike static stretching, which often lengthens and relaxes tissue too much, a dynamic approach combines movement and activation to boost power output, speed up muscle contractions, and lower injury risk. A landmark NSCA study demonstrated that athletes using a targeted dynamic warm-up saw significant gains in vertical jump height and sprint speed compared to those who stuck with static stretches before lifting.
Understand the Benefits of Dynamic Warm-Ups
Dynamic movements tap into post-activation potentiation (PAP), a process where brief, high-intensity muscle contractions temporarily enhance force production. That means your muscles fire more explosively once you’re under the bar. Beyond PAP, a well–designed warm-up:
- Speeds up muscle contraction and relaxation cycles
- Improves rate of force development, translating to stronger, more efficient lifts
- Raises core temperature and blood flow, lubricating joints and boosting oxygen delivery
For the full rundown on these benefits, see the NSCA’s study on dynamic warm-up protocols.
Structure Your Warm-Up Routine
A dynamic warm-up typically unfolds in two phases—general and specific. Aim for 15–25 minutes total, adjusting based on your session’s intensity.
-
General Phase (5–10 minutes)
- Light movement to elevate heart rate and core temperature
- Examples: brisk jogging, jump rope, bodyweight squats
-
Specific Phase (10–15 minutes)
- Mobility drills that mirror your planned lifts
- Activation exercises to cue prime movers
Sample sequence:
- Leg swings (front-to-back and side-to-side) × 8–10 each side
- Banded glute bridges × 12–15 reps
- Shoulder dislocations with band or PVC pipe × 10–12 reps
- Walking lunges with a twist × 8 steps per leg
- Scapular push-ups or band pull-aparts × 12–15 reps
Rotate through these drills with minimal rest, focusing on controlled, full-range movement. By the end, you should feel warm, mobile, and mentally dialed in for your main lifts.
Avoid Overstretching Before Lifting
Static stretching—holding a muscle in a lengthened position for 30 seconds or more—can momentarily reduce musculotendinous stiffness. While that’s useful for post-workout recovery, it can blunt power output if done immediately before heavy lifting. Save static holds for your cooldown to maintain optimal muscle stiffness and force production during training.
Step 3: Master Proper Technique to Maximize Efficiency and Prevent Injury
Technique serves as the foundation of every lift—no amount of brute strength can compensate for sloppy mechanics. Poor form not only limits the weight you can move but also raises your risk of injury, derailing progress for weeks or even months. By honing your technique, you’ll engage the correct muscle groups, maintain consistent movement patterns, and build strength more efficiently over time.
Mastery starts with understanding how your body should move through each exercise. That awareness, combined with targeted feedback, can transform a choppy squat into a fluid, powerful drive or a stalled bench press into a confident lockout. Below are four strategies to refine your form, promote muscular engagement, and stay injury-free.
Seek Professional Feedback on Your Form
Even experienced lifters benefit from an outside eye. A qualified coach or physical therapist can spot subtle breakdowns—like a forward knee drift or an uneven bar path—that you might overlook. One or two sessions can offer personalized cues and corrections, laying the groundwork for safer, more productive training.
If private coaching feels out of reach, consider more budget-friendly options. Group workshops at your local gym often include form clinics, while online consultations let you submit videos for remote critique. Some apps even connect you to certified trainers who provide detailed feedback for a fraction of the cost of in-person coaching.
Use Mirrors and Video Recording
Technology is on your side when it comes to self-assessment. Position a full-length mirror or smartphone camera to capture your lift from multiple angles—front, side, and low profile. Take slow-motion video or review frame-by-frame to examine key points:
- Joint alignment: Are your knees tracking over your toes?
- Bar path: Does the barbell travel in a straight, efficient line?
- Posture: Is your spine neutral, or do you notice excessive rounding or arching?
Watching yourself in real time and on playback creates a feedback loop. Every session becomes an opportunity to correct minor flaws before they become bad habits.
Focus on Muscle Engagement and Movement Control
Lifting isn’t just about shifting weight—it’s about recruiting the right muscles at the right moment. Cultivate a strong mind-muscle connection by visualizing the target muscle contracting throughout each phase of the lift. Slow down your tempo to amplify this effect: try a 3-second eccentric (lowering) phase and a 1-second concentric (lifting) phase to reinforce control.
For example, in a squat, think about “sitting back” into your hips and driving through the heels. During a bench press, cue your chest to press the bar rather than relying solely on shoulders or triceps. On deadlifts, imagine pulling the bar into your shins and extending through the hips, not just bending at the waist. These intentional cues ensure muscles fire in the correct sequence, boosting both power and safety.
Continuously Educate Yourself on Exercise Best Practices
The fitness industry evolves as new research emerges. Stay ahead by tapping into reputable resources: sites run by certified strength and conditioning professionals, peer-reviewed journals like the Journal of Strength and Conditioning Research, and evidence-based podcasts or newsletters. Subscribing to insights from respected coaches keeps you informed on technique refinements, emerging drills, and injury-prevention strategies. A commitment to lifelong learning ensures your form—and your gains—never stagnate.
Step 4: Prioritize Compound Movements for Maximum Muscle Recruitment
When you’re pressed for time or trying to pack the greatest training effect into every session, compound exercises are your best friend. These multi-joint movements recruit several muscle groups at once, driving a bigger hormonal response—think surges in testosterone and growth hormone—that fuels strength gains and muscle growth. In practical terms, that means you get more “bang for your buck” than you would by isolating one muscle at a time.
Beyond the hormonal perks, compound lifts burn more calories and improve functional strength. Whether you need better stability under a heavy barbell or want to move more confidently in everyday tasks, mastering multi-joint exercises transfers directly to real-world performance. And because you’re working multiple muscles in a single rep, you’ll spend less time bouncing between machines and more time pushing serious weight.
With their ability to build size, boost strength, and save time, compound movements deserve center stage in any smart lifter’s program. The next sections break down what makes an exercise “compound,” highlight the must-have lifts, and show you how to weave them into a balanced workout plan.
What Defines a Compound Exercise?
Compound exercises are movements that engage two or more joints and the muscles surrounding them. Unlike isolation exercises—where one joint and muscle group do all the work—compound lifts ask your body to coordinate multiple limbs and motor patterns. Key benefits include:
- Hormonal response: Increased demand on large muscle groups triggers a stronger anabolic hormone release.
- Caloric burn: You expend more energy when you move a heavier load through multiple joints.
- Time efficiency: One exercise replaces several isolation movements, freeing up room for accessories or additional workouts.
Top Compound Lifts Every Lifter Should Include
These five core lifts form the backbone of a high-recruitment training program. Each one hits multiple muscle groups and builds a foundation of raw strength.
- Squat (Back, Front, Goblet): Targets quads, hamstrings, glutes, and lower back while challenging core stability.
- Deadlift (Conventional, Sumo, Romanian):Engages the posterior chain—hamstrings, glutes, spinal erectors—and heavily recruits traps and forearms.
- Bench Press (Flat, Incline, Decline): Works pecs, anterior deltoids, and triceps with shoulder-and chest-driving power.
- Overhead Press (Barbell or Dumbbell): Develops shoulders, triceps, upper chest, and core for full-body rigidity under load.
- Pull-Up/Chin-Up: Builds lats, biceps, traps, and forearms while demanding scapular control and grip strength.
Build a Balanced Compound-Focused Workout Plan
Once you’ve nailed technique on these key lifts, structure your week to hit each pattern regularly without overreaching. Two popular templates include:
Upper/Lower Split (4 days/week)
- Day 1: Squat variation + Bench press + Accessory work
- Day 2: Deadlift variation + Overhead press + Accessory work
- Day 3: Rest or active recovery
- Day 4: Squat variation + Bench press accessory (e.g., paused bench)
- Day 5: Deadlift variation + Pull-ups + Accessory work
Push/Pull/Legs Split (6 days/week)
- Day 1: Push (bench, overhead press) – 3×5–8 sets × reps
- Day 2: Pull (deadlift, rows, pull-ups) – 3×5–8
- Day 3: Legs (squat, lunges) – 3×6–10
- Day 4: Push accessory (incline bench, dips) – 3×8–12
- Day 5: Pull accessory (chin-ups, face pulls) – 3×8–12
- Day 6: Legs accessory (Romanian deadlifts, calf raises) – 3×8–12
- Day 7: Rest
Aim for 9–15 total sets per movement pattern each week, adjusting load and volume to match your recovery. Track your sets, reps, and weight in your training log—and watch how a compound-centric approach turbocharges both efficiency and results.
Step 5: Apply Progressive Overload to Stimulate Adaptation
Your body adapts quickly to any stimulus, so to keep moving the needle on strength and muscle growth, you need to steadily up the ante. Progressive overload is all about introducing small, consistent increases in training demand—forcing your muscles, connective tissues, and nervous system to respond by getting stronger and more resilient. When applied correctly, it helps you avoid plateaus and build momentum in every phase of your program.
Progressive Overload Principles
At its core, progressive overload means you’re doing a little bit more than last time—whether that’s adding another pound to the bar, cranking out an extra rep, or trimming a few seconds off your rest. The key principles are:
- Consistency: Incremental changes (1–5% at a time) compound over weeks and months.
- Variety: Overload can come from weight, volume, intensity, or density—mixing methods prevents stagnation.
- Recovery: As you ratchet up stress, make sure nutrition, sleep, and deload weeks keep pace.
Think of overload as a dial you turn up just enough to challenge your system without throwing it into breakdown mode.
Methods to Increase Training Stimulus
Here are practical ways to dial in progressive overload on any lift or movement pattern:
- Add Weight: Increase the load on the bar by 2.5–10 pounds (1–5% of your working weight) once you hit your target reps with solid form.
- Boost Reps: If you’re scheduled for 3×8 but complete 3×9, use that as a signal to raise the weight next session.
- Add Sets: An extra set (for example going from 3×8 to 4×8) pushes up weekly volume.
-
Tweak Tempo: Slow down the eccentric phase (e.g., a
3-seconddescent) to increase time under tension. - Trim Rest: Reducing rest intervals by 15–30 seconds forces your body to adapt to work density.
- Advanced Techniques: Incorporate drop sets, supersets, or paused reps to introduce new stressors without jumping weight too fast.
Rotate through a mix of these methods every few weeks to keep your muscles—and mind—on their toes.
Track and Adjust Your Overload Plan
A training log is your best friend when it comes to progressive overload. Recording sets, reps, weight, RPE, and notes helps you spot trends and know when it’s time to bump things up. Aim to adjust overload variables every 1–2 weeks based on your performance and recovery.
Example progression chart (Back Squat, 3×5):
| Week | Weight (lbs) | Sets × Reps | Rest (sec) |
|---|---|---|---|
| 1 | 185 | 3 × 5 | 120 |
| 2 | 190 | 3 × 5 | 120 |
| 3 | 195 | 3 × 5 | 120 |
| 4 (Deload) | 170 | 2 × 5 | 120 |
| 5 | 200 | 3 × 5 | 120 |
In this example, you add 5 pounds each week for three weeks, then dial back volume on week four to let your body recover, before pushing beyond your previous top weight in week five. Adjust the rate and magnitude of overload based on how you feel—watch for sustained strength gains, controlled technique, and minimal joint discomfort.
By systematically applying progressive overload and keeping meticulous records, you’ll turn small gains into big breakthroughs—one rep, set, and week at a time.
Step 6: Optimize Nutrition and Nutrient Timing for Strength and Recovery
What you eat—and when you eat it—can make or break your gains. Dialing in a macronutrient plan that aligns with your training load, body composition goals, and recovery needs is just as critical as your time under the bar. In this section, you’ll learn how to calculate your daily protein, carbohydrate, and fat targets, structure your intra- and post-workout fuel strategy based on the latest ISSN recommendations, and distribute protein evenly throughout the day to maximize muscle protein synthesis (MPS).
Determine Your Macronutrient Targets
Start by setting your daily calorie goal based on your maintenance calories and whether you’re aiming to bulk, cut, or maintain. Then break those calories into macros:
- Protein: 0.8–1.2 g per pound of body weight
- Carbohydrates: 3–5 g per kilogram of body weight
- Fats: 20–35% of total calories
Example for a 180-lb lifter eating 3,000 kcal/day (moderate bulk):
Protein: 180 lb × 1.0 g = 180 g → 720 kcal
Carbs: 4 g/kg × (180 lb ÷ 2.2) ≈ 327 g → 1,308 kcal
Fats: (3,000 − 720 − 1,308) ÷ 9 ≈ 109 g → 981 kcal
That breakdown lands roughly at 24% protein, 44% carbs, and 32% fats.
Sample meal-plan breakdown:
- Breakfast: 30 g protein, 60 g carbs, 15 g fat
- Lunch: 40 g protein, 80 g carbs, 20 g fat
- Pre-workout snack: 20 g protein, 40 g carbs, 5 g fat
- Post-workout shake: 30 g protein, 50 g carbs, 0–5 g fat
- Dinner: 40 g protein, 70 g carbs, 30 g fat
- Evening snack: 20 g protein, 20 g carbs, 10 g fat
Plan Intra- and Post-Workout Nutrition Using Evidence-Based Guidelines
Nutrient timing doesn’t trump total daily intake, but when you’re training hard, fine-tuning your intra- and post-workout fuel can boost performance and recovery. According to the ISSN position stand on nutrient timing, aim for:
- Pre-Workout (30–60 minutes before): 20–30 g fast-digesting protein + 30–50 g carbs (e.g., Greek yogurt with fruit or a whey-banana smoothie)
- During Training (sessions > 60 minutes): 30–60 g carbs/hour (sports drink, dextrose gummies) to sustain intensity and delay fatigue
- Post-Workout (within 45 minutes): 20–40 g high-quality protein + 40–60 g carbs to replenish glycogen and maximize MPS
For more detail on timing and dosing, see the full ISSN position stand: https://jissn.biomedcentral.com/articles/10.1186/s12970-017-0189-4
Distribute Protein Intake Throughout the Day
Muscle protein synthesis responds best to regular feedings rather than one massive protein dose. Space your protein across 4–6 meals every 3–4 hours:
- 20–40 g protein per feeding — this saturates MPS without waste
- Casein before bed — a slow-release option to support overnight repair
High-quality protein sources:
- Lean meats (chicken breast, lean beef)
- Fish (salmon, cod, tuna)
- Dairy (Greek yogurt, cottage cheese, milk)
- Eggs and egg whites
- Whey and casein powder
- Plant options (tofu, tempeh, lentils, edamame)
By nailing your macros, hitting strategic nutrient windows, and spacing protein evenly, you’ll fuel stronger training sessions and speed up recovery—setting the stage for bigger lifts and fewer missed workouts.
Step 7: Hydrate Strategically to Support Performance
Hydration isn’t just about quenching thirst—it’s a cornerstone of energy metabolism, cognitive sharpness, and workout capacity. Even mild dehydration (as little as 2% body weight loss) can sap strength, slow reaction time, and make heavy sets feel heavier. By planning your fluids around daily needs and sweat losses, you’ll keep muscles firing optimally, maintain focus under load, and recover faster between sessions.
Calculate Your Daily and Workout Hydration Needs
A practical starting point is to drink 0.5–1 ounce of fluid per pound of body weight each day. For example, a 180-pound lifter should aim for 90–180 ounces of fluids (about 2.7–5.3 liters). To fine-tune this:
- Weigh yourself before and after training (clothed, towel-dried).
- Subtract post-session weight from pre-session weight to find fluid loss in pounds.
- Replace each pound lost with approximately 16 ounces (1 pint) of fluid.
Fluid replacement (oz) = Pre-workout weight (lbs) – Post-workout weight (lbs) × 16
Adjust your daily target upward on heavy training days or in hot, humid environments.
Implement Pre-, Intra-, and Post-Workout Hydration Strategies
Spreading fluid intake throughout the day and around training sessions prevents energy slumps and cramps. Here’s a sample schedule:
- 2+ hours before exercise: 16–20 oz of plain water or a low-sugar electrolyte drink.
- 30–60 minutes before: 8–10 oz to top off fluid levels.
- During workouts (<60 min): 6–8 oz every 15–20 minutes—plain water is fine for shorter sessions.
- During workouts (>60 min): 6–12 oz of an electrolyte-enhanced beverage every 15–20 minutes to replace sodium, potassium, and chloride lost in sweat.
- Post-workout (within 30 min): 16–24 oz for every pound lost, alternating water with a carb-electrolyte mix to speed rehydration and replenish glycogen.
Keeping a half-filled bottle within arm’s reach makes sipping habitual rather than sporadic.
Monitor Hydration Status
Staying ahead of dehydration means tuning into simple body signals:
- Urine Color: Aim for a pale straw or light yellow hue. Darker shades suggest you need more fluids.
- Thirst and Dry Mouth: Thirst is a late indicator—if you feel parched, you’re already behind the curve.
- Performance Clues: Sudden jumps in heart rate, dizziness, headaches, or unexplained fatigue often point back to low fluid levels.
By calculating your baseline needs, following a structured sipping plan, and checking key markers like urine color, you’ll maintain peak training intensity, protect your joints, and ensure every rep—whether it’s a grinder set of squats or a midday circuit—is powered by optimal hydration.
Step 8: Use Evidence-Based Supplements to Enhance Performance
Supplements aren’t magic bullets, but when used strategically, they can complement solid training, nutrition, and recovery practices. Focusing on well-researched ergogenic aids will help you avoid wasting time and money on unproven products. Below are four key considerations for intelligent supplementation.
Creatine for Strength and Power
Creatine monohydrate stands out as the most extensively studied and effective supplement for boosting strength, muscle size, and high-intensity performance. It works by replenishing adenosine triphosphate (ATP) during short, explosive efforts—think heavy squats, sprints, or maximal bench presses.
- Standard maintenance dose:
3–5 gper day - Loading option:
20 gper day (split into 4 doses) for 5–7 days, then3–5 gmaintenance - Timing: Can be taken any time of day; post-workout with carbohydrates may slightly enhance uptake
Myths like “creatine causes bloating” often stem from early loading protocols; modern research shows most users experience minimal water retention when using lower daily doses. If you have kidney concerns, consult a healthcare professional before starting.
Caffeine for Energy and Focus
Caffeine is a well-established stimulant that can sharpen mental alertness, reduce perceived effort, and improve endurance and strength performance. It’s especially useful for early-morning sessions or when you’re fighting through training fatigue.
- Ergogenic dose:
3–6 mgper kilogram of body weight - Timing: Consume
30–60minutes before training for peak blood levels - Side effects: Insomnia, jitters, elevated heart rate—start at the lower end of the dose range to assess tolerance
To avoid building a high tolerance, cycle caffeine use—skip it on easy training days or have at least two caffeine-free days per week.
Glycerol-Based Pump Supplements
Glycerol supplements work by increasing the fluid drawn into muscle cells and blood plasma, improving hydration status and giving you that “full” pump feeling under the bar. Better cell volumization can translate to improved endurance in prolonged or high-rep workouts.
- Typical dosage:
1 gof glycerol per kilogram of body weight, mixed in at least 600 mL of water - Timing: Consume
60–90minutes before exercise to allow fluid shifts - Notes: Always stir or shake well—glycerol can settle at the bottom of a shaker
Because glycerol can draw more fluid into cells, start with a lower dose to gauge gastrointestinal tolerance and avoid cramps.
Evaluate Supplement Quality and Safety
Not all supplements are created equal. To minimize risk and ensure you’re getting what you pay for, look for products with third-party verification:
- NSF Certified for Sport
- Informed-Choice or Informed-Sport
- USP Verified
Read labels carefully: avoid proprietary blends that hide individual dosages, and steer clear of supplements with suspiciously long ingredient lists or hidden stimulants. When possible, cross-check batch numbers or certificates of analysis to confirm purity and absence of banned substances.
By integrating creatine, caffeine, and glycerol into a broader nutrition and training strategy—and by prioritizing quality control—you’ll gain small but meaningful advantages that add up to consistent performance improvements over time.
Step 9: Plan Adequate Rest and Recovery for Sustainable Gains
Training hard without intentional recovery is like driving a car at full throttle without ever stopping for gas—eventually, you’ll stall. Rest days and recovery strategies give your muscles, joints, and central nervous system time to repair, adapt, and grow stronger. Over time, this balance between stress and rest prevents overtraining, reduces injury risk, and keeps your performance trajectory moving upward.
Schedule Rest and Active Recovery Days
Building rest into your week doesn’t mean you’re slacking—it means you’re training smarter. Aim for 1–2 full rest days where the goal is zero lifting and minimal structured cardio. On these days, focus on gentle movement to promote circulation without taxing your system:
- Mobility drills: Hip openers, thoracic rotations, ankle circles
- Yoga or stretching sessions: 20–30 minutes of full-body flow
- Light cardio: A brisk 20-minute walk or easy bike ride
Active recovery enhances blood flow to sore tissues, helping clear metabolic byproducts and accelerating the repair process. Keep intensity low and duration short so you arrive at your next workout refreshed rather than fatigued.
Prioritize Quality Sleep and Sleep Hygiene
Sleep is where the real magic happens. During deep sleep stages, growth hormone surges and protein synthesis ramps up—laying the foundation for bigger lifts and denser muscle. Shoot for 7–9 hours of uninterrupted sleep each night, and treat your bedroom like a recovery zone:
- Consistent schedule: Go to bed and wake up within the same one-hour window every day.
- Dark, cool environment: Aim for 60–67°F and blackout curtains to block light.
- Screen curfew: Power down electronics at least 30 minutes before lights out to reduce blue-light interference with melatonin production.
If you struggle with sleep, consider a wind-down ritual—light stretching, reading, or deep-breathing exercises—to cue your body that it’s time to switch off.
Incorporate Recovery Techniques
Beyond rest days and sleep, targeted recovery methods can tackle knots, improve tissue quality, and ease soreness. Rotate the following modalities based on your training load and personal preferences:
- Foam Rolling (2–3× per week): Self-myofascial release on quads, calves, lats, and glutes helps relieve trigger points and improve range of motion.
- Massage or Percussive Therapy (weekly or biweekly): A certified massage therapist or a handheld percussion gun can break up adhesions, speed circulation, and reset muscle tone.
- Contrast Baths or Showers (post-workout or rest days): Alternating 1–2 minutes of hot water with 30 seconds of cold exposure promotes vascular flushing, which may reduce inflammation and accelerate recovery.
- Light Compression or Elevation: For acute soreness or mild swelling, a brief period of compression sleeves or elevating the limbs above heart level can improve fluid dynamics in fatigued tissues.
Experiment with different techniques and track how each one affects your soreness and readiness scores. Recovery isn’t one-size-fits-all; find the combination that keeps you feeling primed and ready to hit your next session with full force.
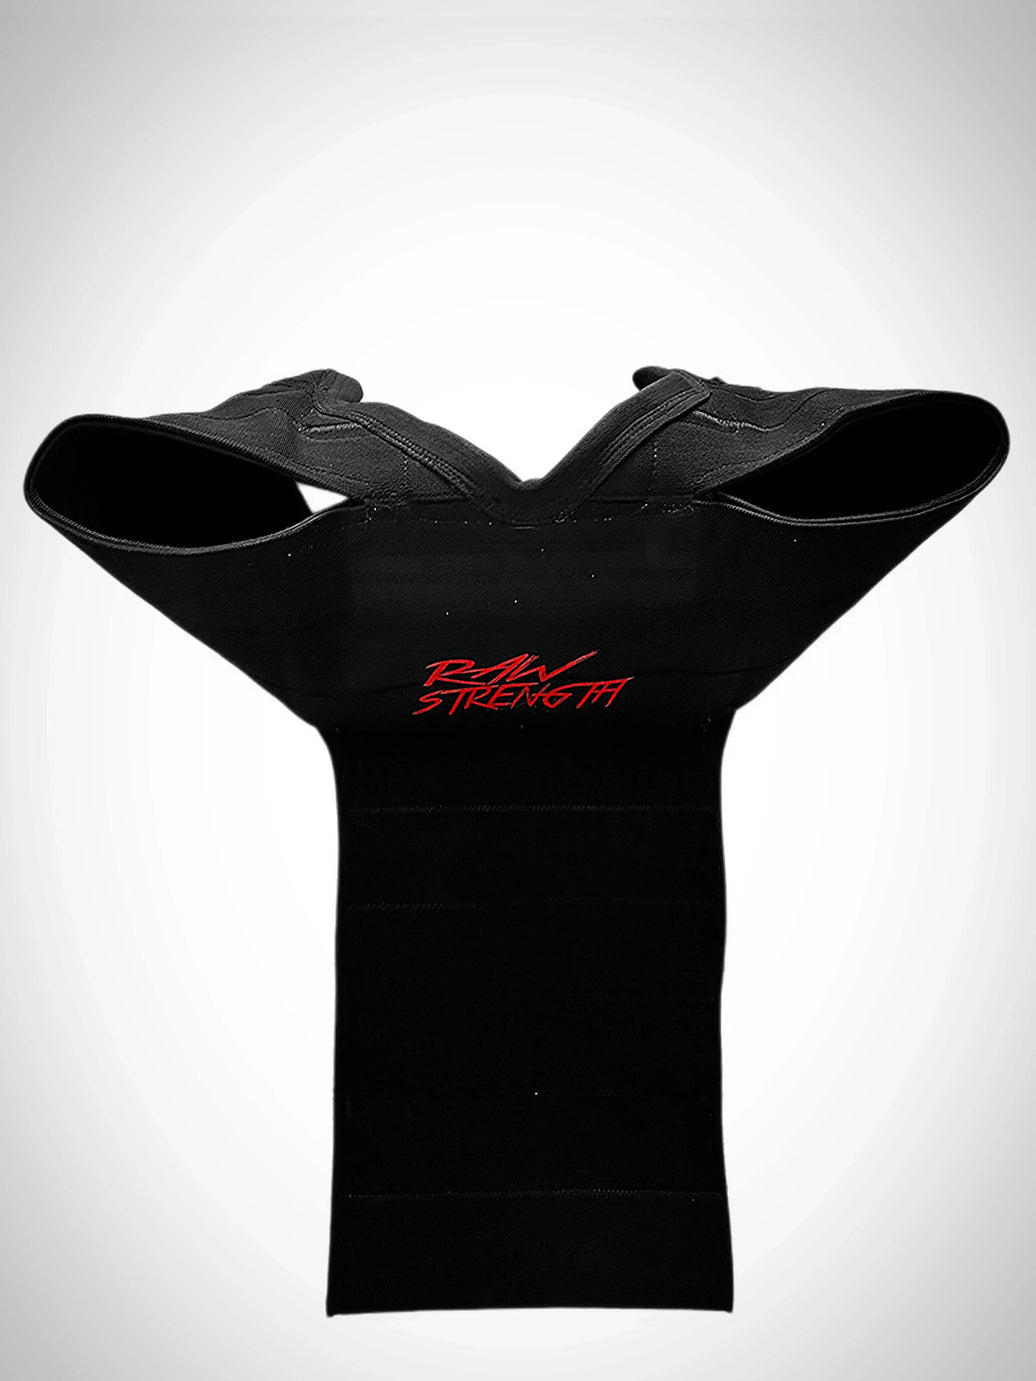
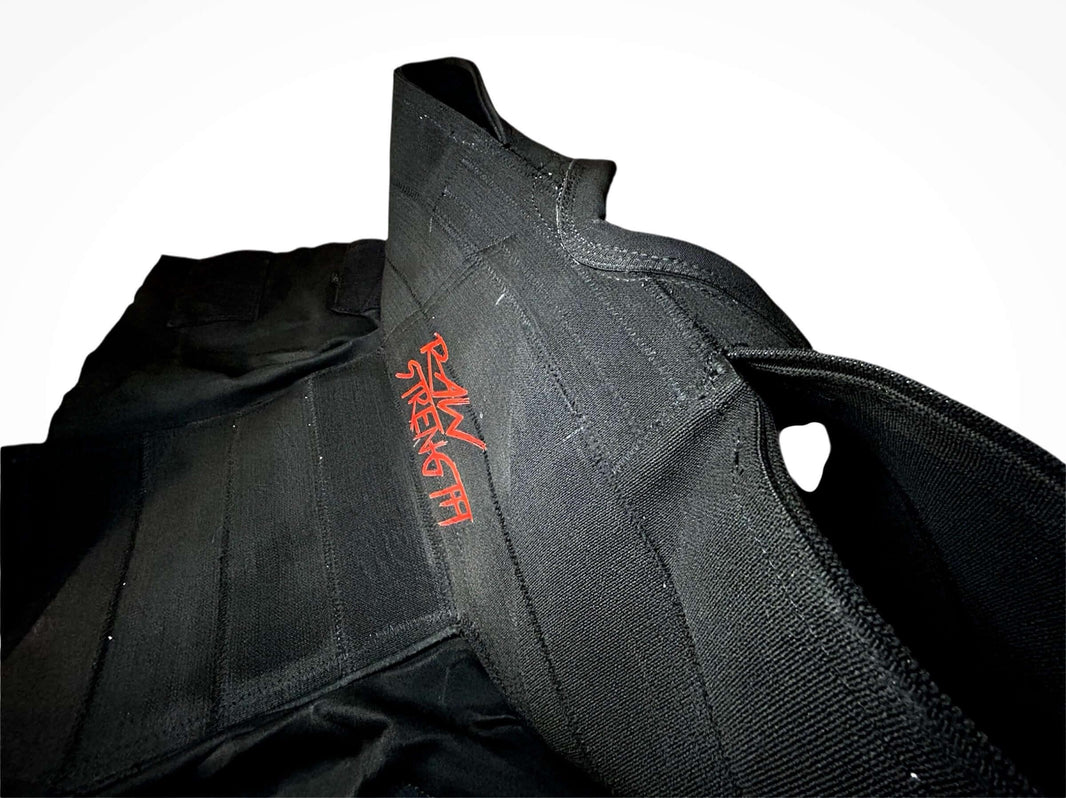
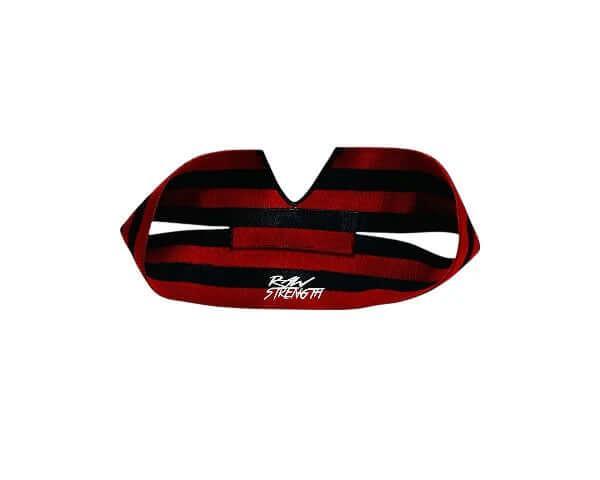
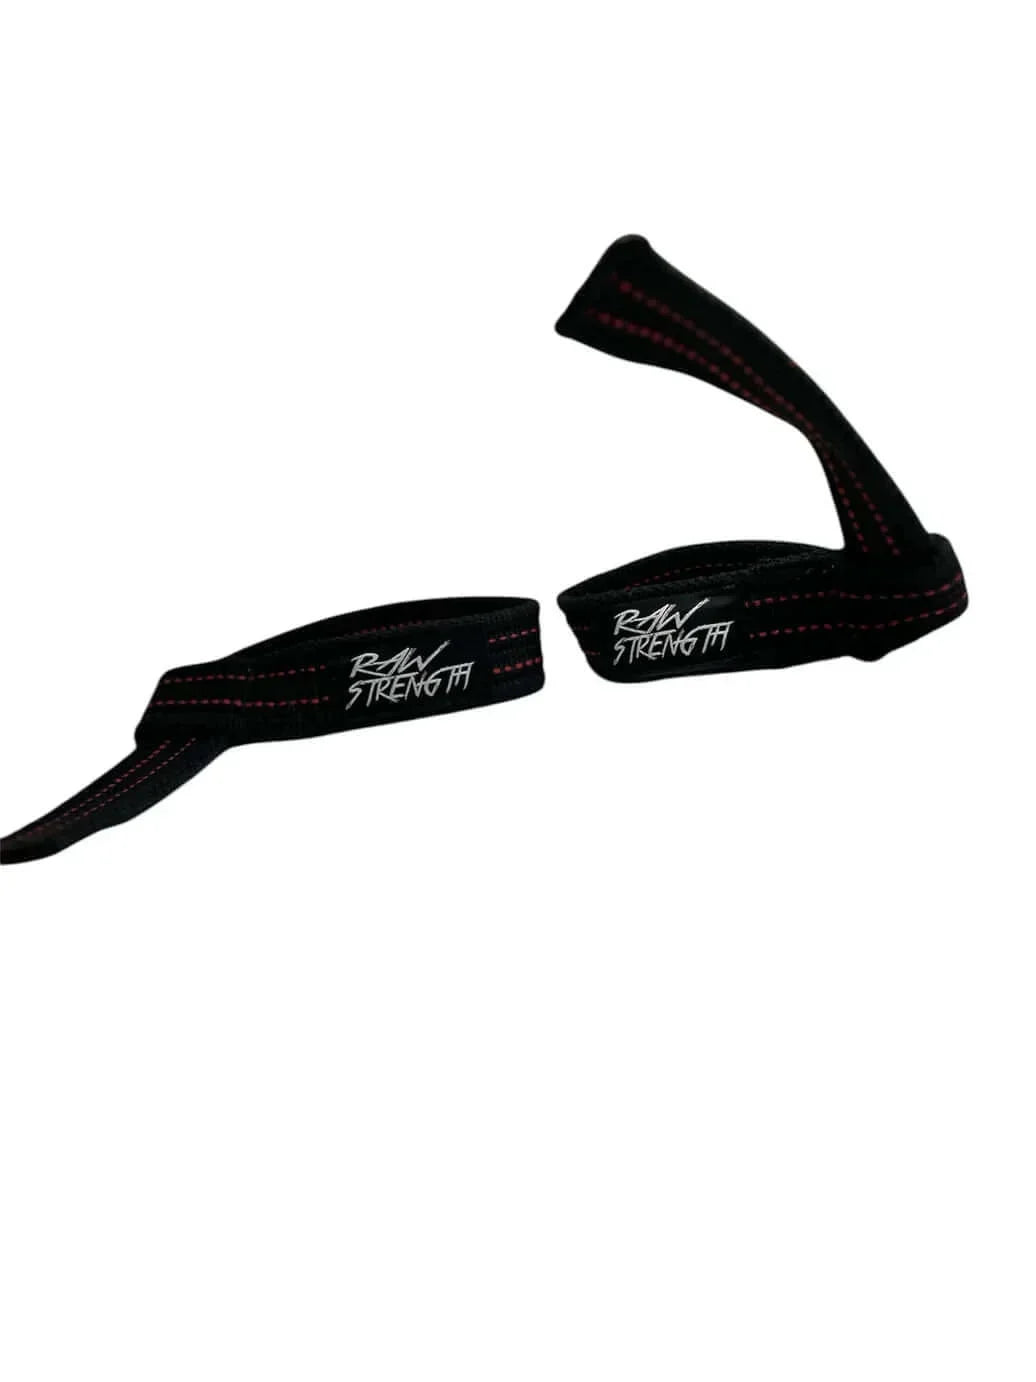
Step 10: Invest in Quality Performance Gear for Safety and Support
When you’re pushing personal records or grinding through high-volume training blocks, the right gear can make all the difference. Supportive accessories help stabilize joints, protect against repetitive stress, and let you train with confidence—so you can focus on performance instead of pain. Below, we break down the must-have items, how to choose them wisely, and why Raw Strength Apparel is a go-to source for lifters who demand durable, athlete-tested equipment.
Essential Lifting Accessories
Before loading the bar, equip yourself with tools that enhance stability and minimize injury risk:
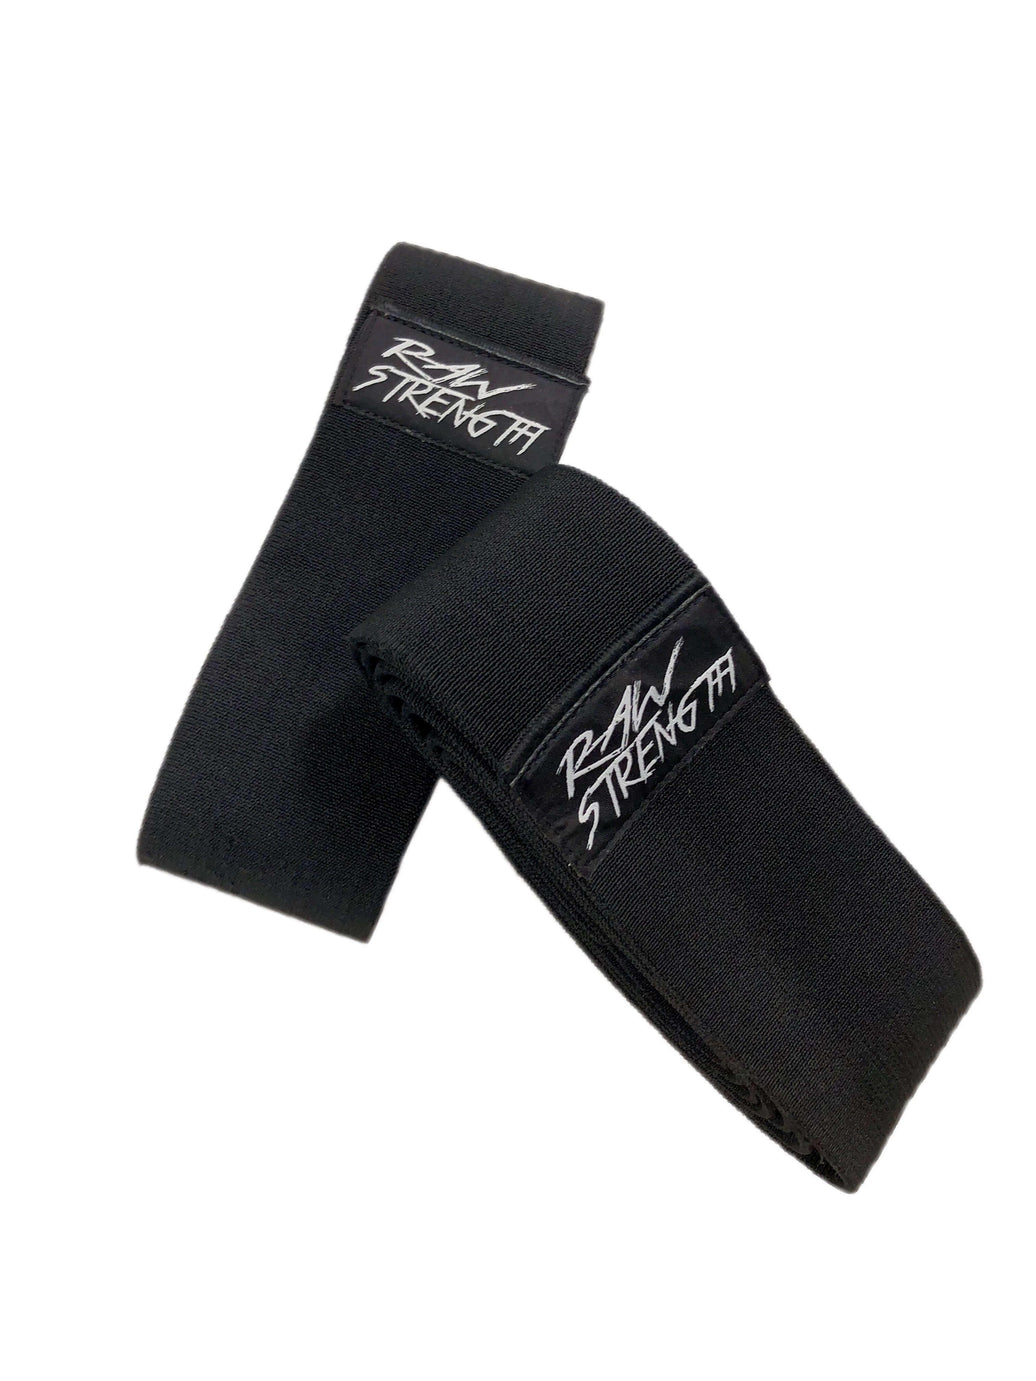
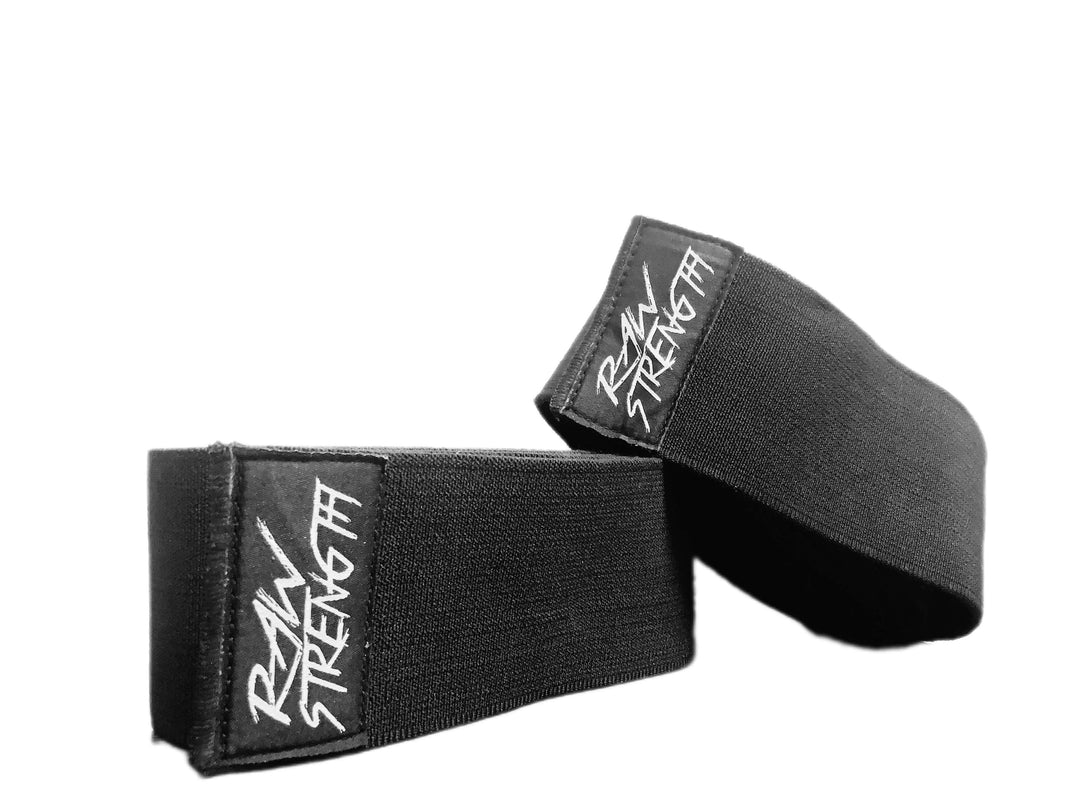
- Wrist Wraps: Provide firm support around the wrist joint, reducing hyperextension during heavy bench presses or overhead work.
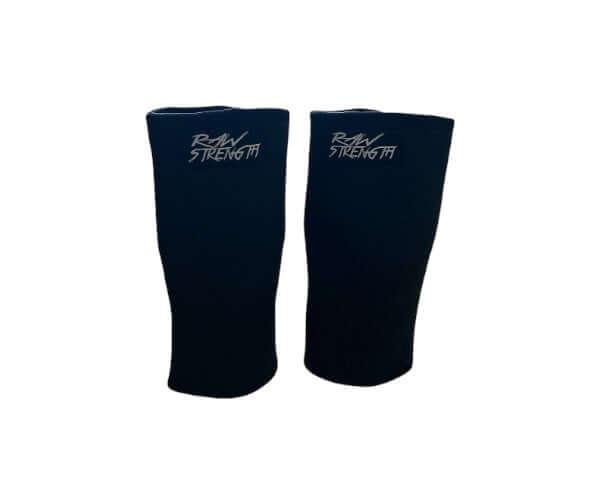
- Knee Sleeves: Offer compression and warmth to the knees, improving blood flow and proprioception in squats, lunges, and Olympic lifts.
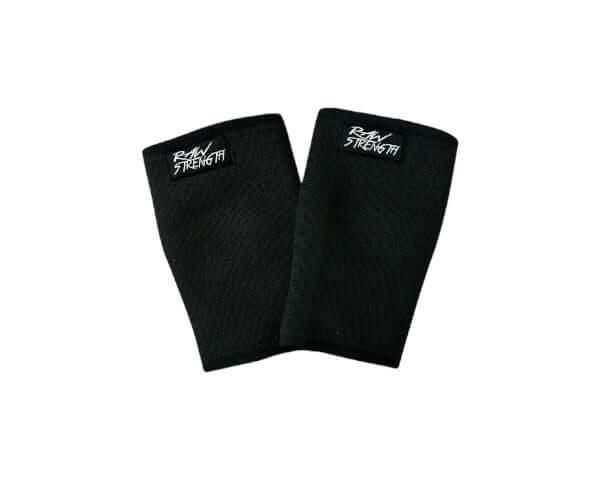
- Lifting Straps: Securely anchor your grip to the barbell or dumbbells when forearm fatigue threatens to cut a deadlift or row set short.
- Belts: Increase intra-abdominal pressure to stabilize your spine, making it safer to handle maximal loads in squats and deadlifts.
How to Choose the Right Gear for Your Needs
Not all performance accessories are created equal, and picking the wrong thickness or fit can actually hinder your lift. Look for these criteria when shopping:
- Material: High-grade neoprene and reinforced stitching resist sweat breakdown and hold their shape over time.
- Thickness: Thicker wraps (6–7 mm) deliver more rigid support, while thinner options (3–4 mm) allow greater joint mobility—choose based on your lift selection and personal preference.
- Fit: Adjustable closures and pre-curved designs should feel snug but never cut off circulation; test new gear with light movements before loading heavy.
Gear should be replaced when elasticity fades, straps fray, or seams start to separate. As a rule of thumb, inspect your wraps, sleeves, and belts every 3–6 months if you train 4+ times per week. Rotating between two sets extends gear life and ensures you always have a backup when one set is drying or airing out.
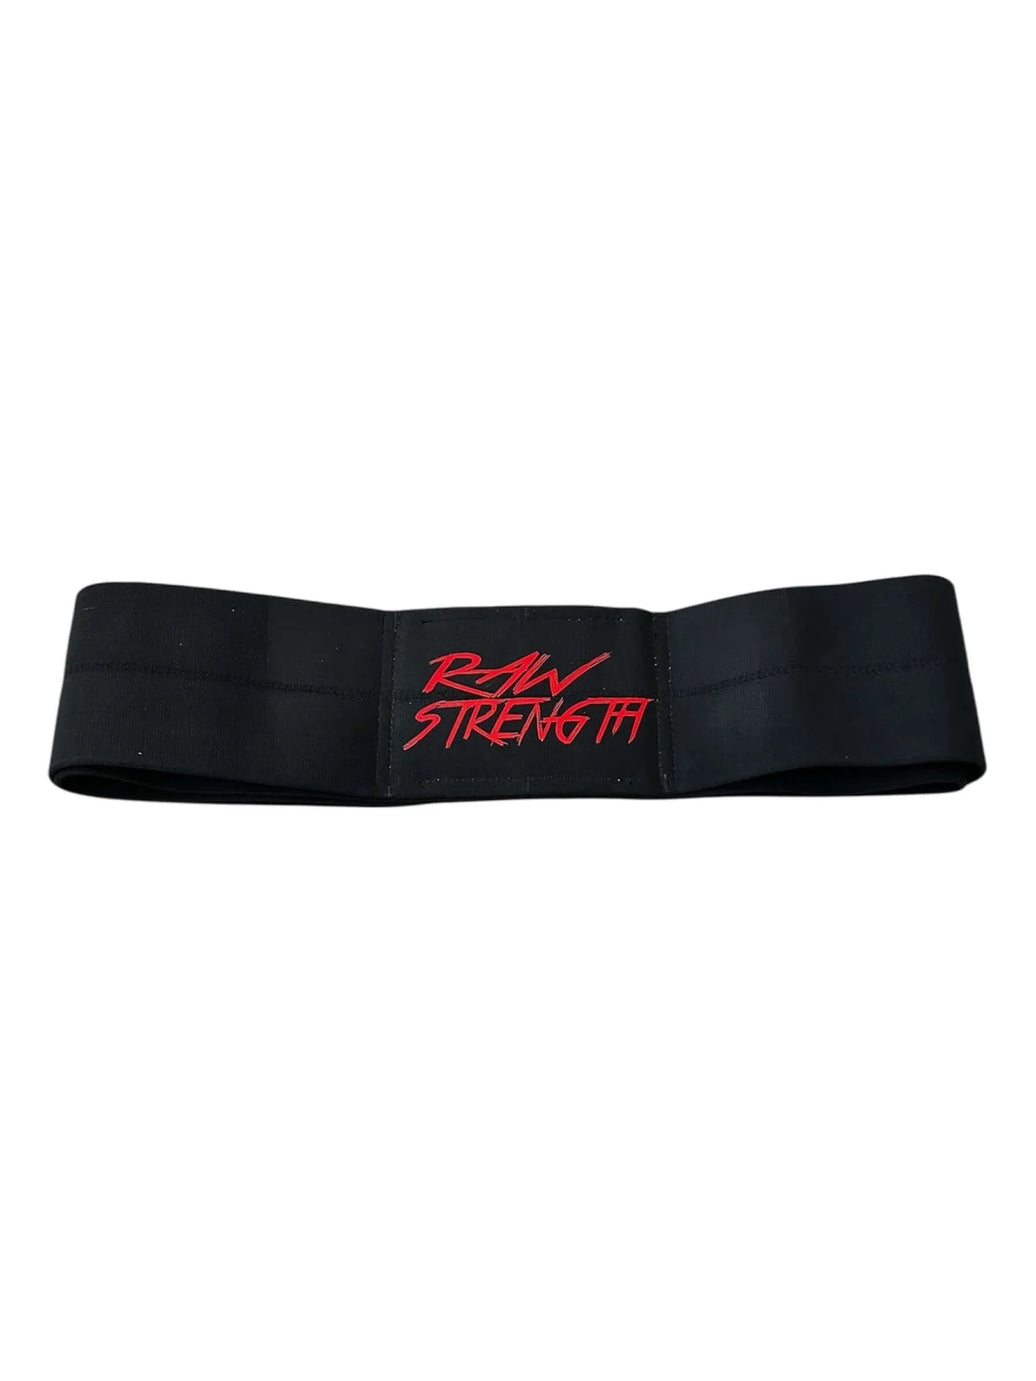
Why Raw Strength Apparel Should Be on Your Radar
Designed by lifters and rigorously tested by elite athletes, Raw Strength Apparel delivers performance gear that stands up to the toughest training environments. Every wrist wrap, knee sleeve, and lifting strap is crafted with premium materials and precision stitching—so you get consistent support, session after session. Ready to upgrade your setup? Explore the full line at Raw Strength Apparel and equip yourself with gear engineered for lifters who settle for nothing less than raw strength.
Bringing It All Together
From setting SMART goals and measuring your starting point to dialing in your warm-up, technique, nutrition, and recovery, each of the ten steps plays a critical role in unlocking sustained progress. When you combine:
- Defined goals and baseline data
- Evidence-based warm-ups to prime power
- Rock-solid form with coach or video feedback
- Compound movements for maximum recruitment
- Progressive overload to force adaptation
- Targeted nutrition and nutrient timing
- Strategic hydration protocols
- Proven supplements like creatine and caffeine
- Deliberate rest and recovery methods
- High-quality gear that supports your lifts
you create a feedback loop where every workout builds on the last.
Start by auditing your log: Are your goals written down and reviewed weekly? Is your warm-up sequence firing up the right muscles? Are you hitting your macros, sipping fluids, and getting enough sleep to back it all up? Use this checklist as your weekly tune-up.
Remember, consistent small gains—an extra rep here, a slight weight increase there—snowball into breakthroughs. Whether you’re chasing a heavier deadlift or shattering your own endurance benchmarks, this holistic approach ensures you’re firing on every cylinder.
Ready to elevate your training? Gear up with equipment designed by lifters for lifters. Head over to Raw Strength Apparel to explore wraps, sleeves, straps, and more—built tough to support your strongest sessions yet. Your next personal best is waiting.
